Configuring Proxifier for Windows
Proxifier program uses to quickly configure HTTPS and Socks proxy. It automatically redirects all network connections through a proxy. In this case no traffic goes past the proxy.
More about configuring Proxifier on macOS.
Proxifier program fee, but you can use it conditionally free for 1 month. Download Proxifier from official website. There are 2 versions of program: "Standard Edition" and "Portable Edition". We recommend to use "Portable Edition" because do not need to install it. Proxy Checker included in the program, so download it separately is not necessary.
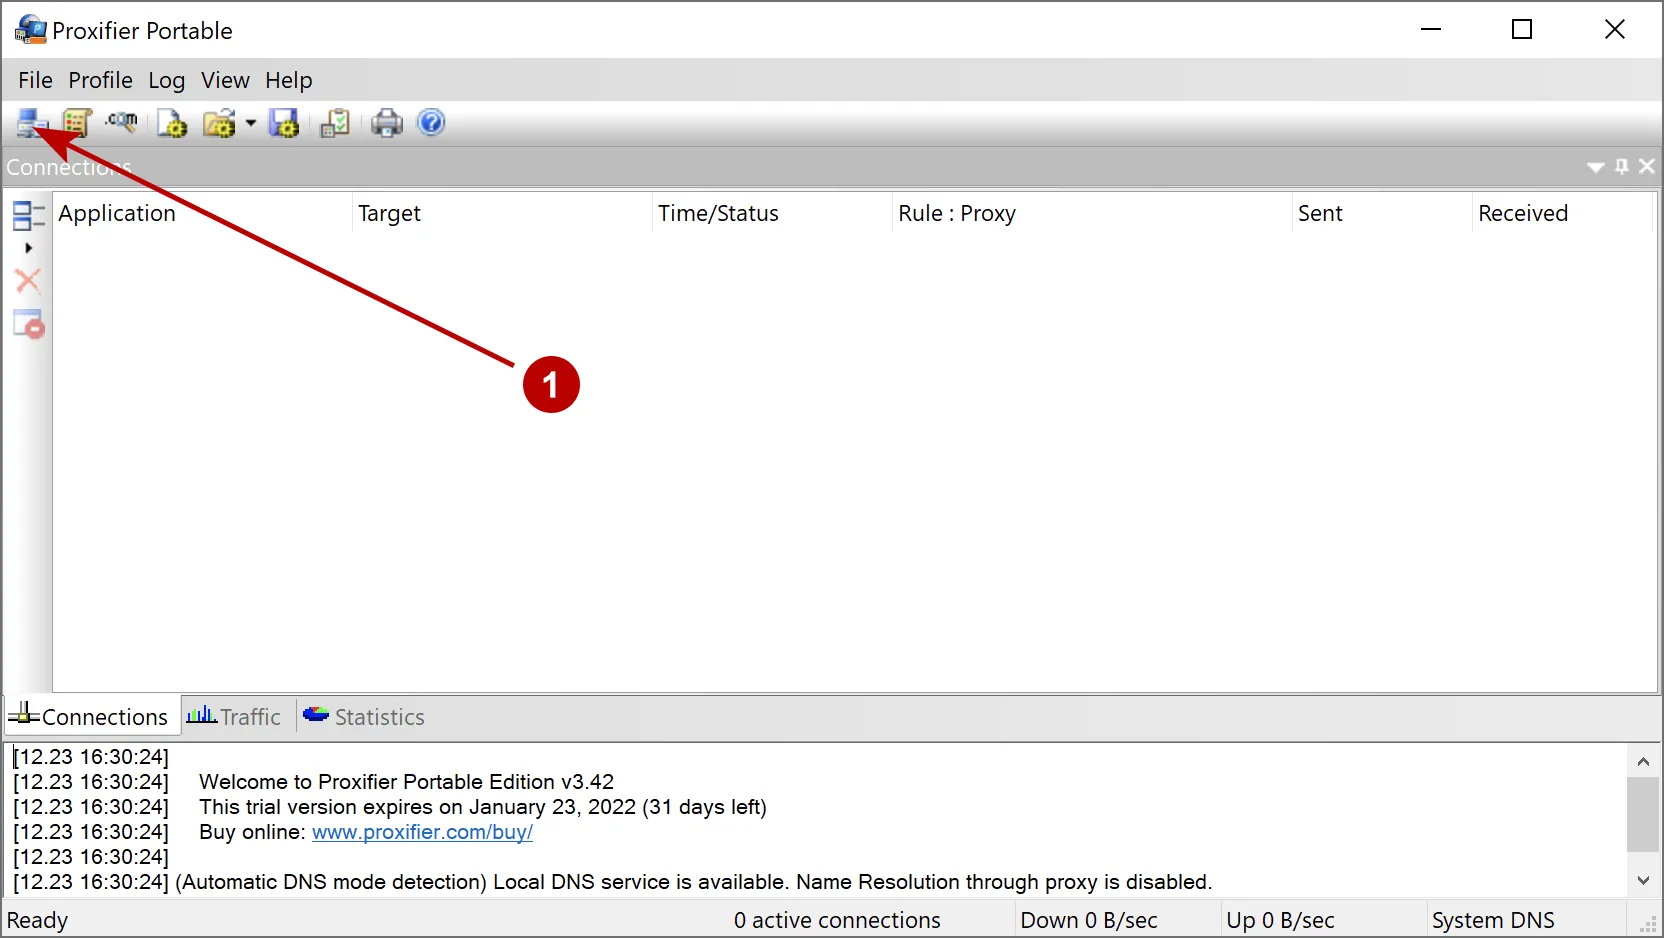
Click to icon "Proxies" in the upper left corner.
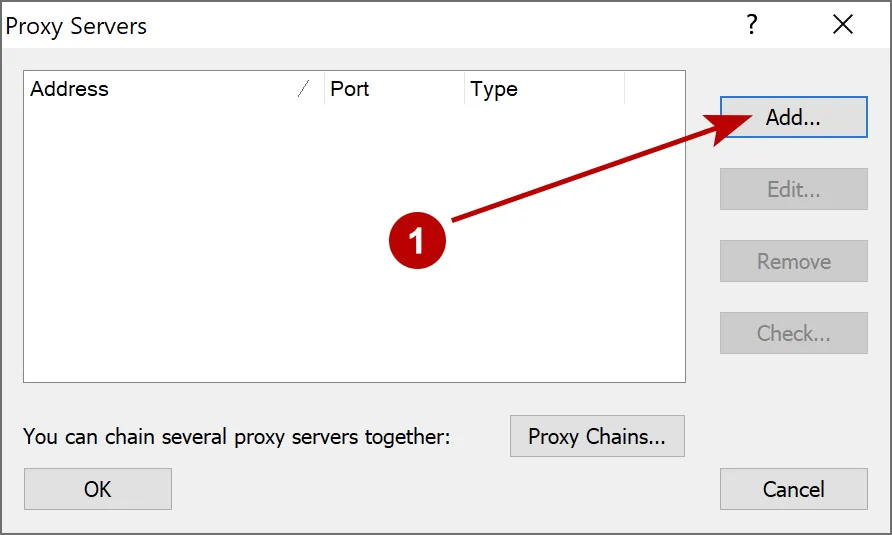
For the initial addition of a proxy click "Add". Button "Proxy Chains" used to create a proxy chain.
Specify the IP address, port of the proxy server and protocol version. If proxy authentication is required, then put the check "Enable" and type login and password.

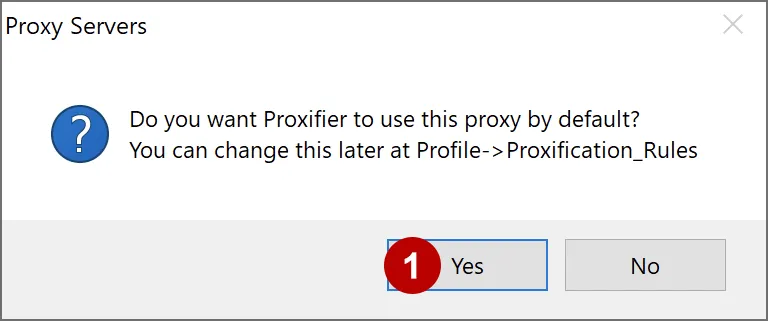
Confirm adding default proxy.
After these settings, all traffic will go through the proxy. You can check your IP address.
Manage proxy chain in Proxifier
Follow the steps below in the section Proxies:
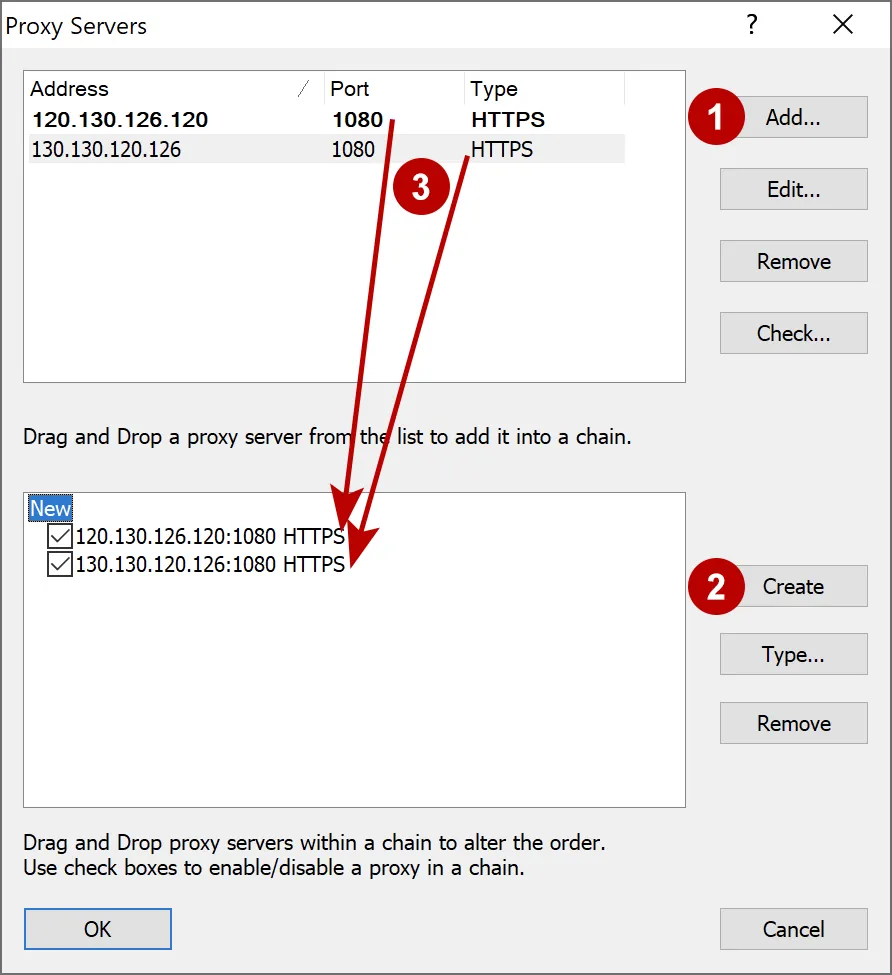
- Add several proxies
- Click on the "Proxy Chains" button and then on the "Create" button to create a new proxy chain. Name the new chain, for example "New"
- Drag the proxy from the top window to the bottom one in the order you want
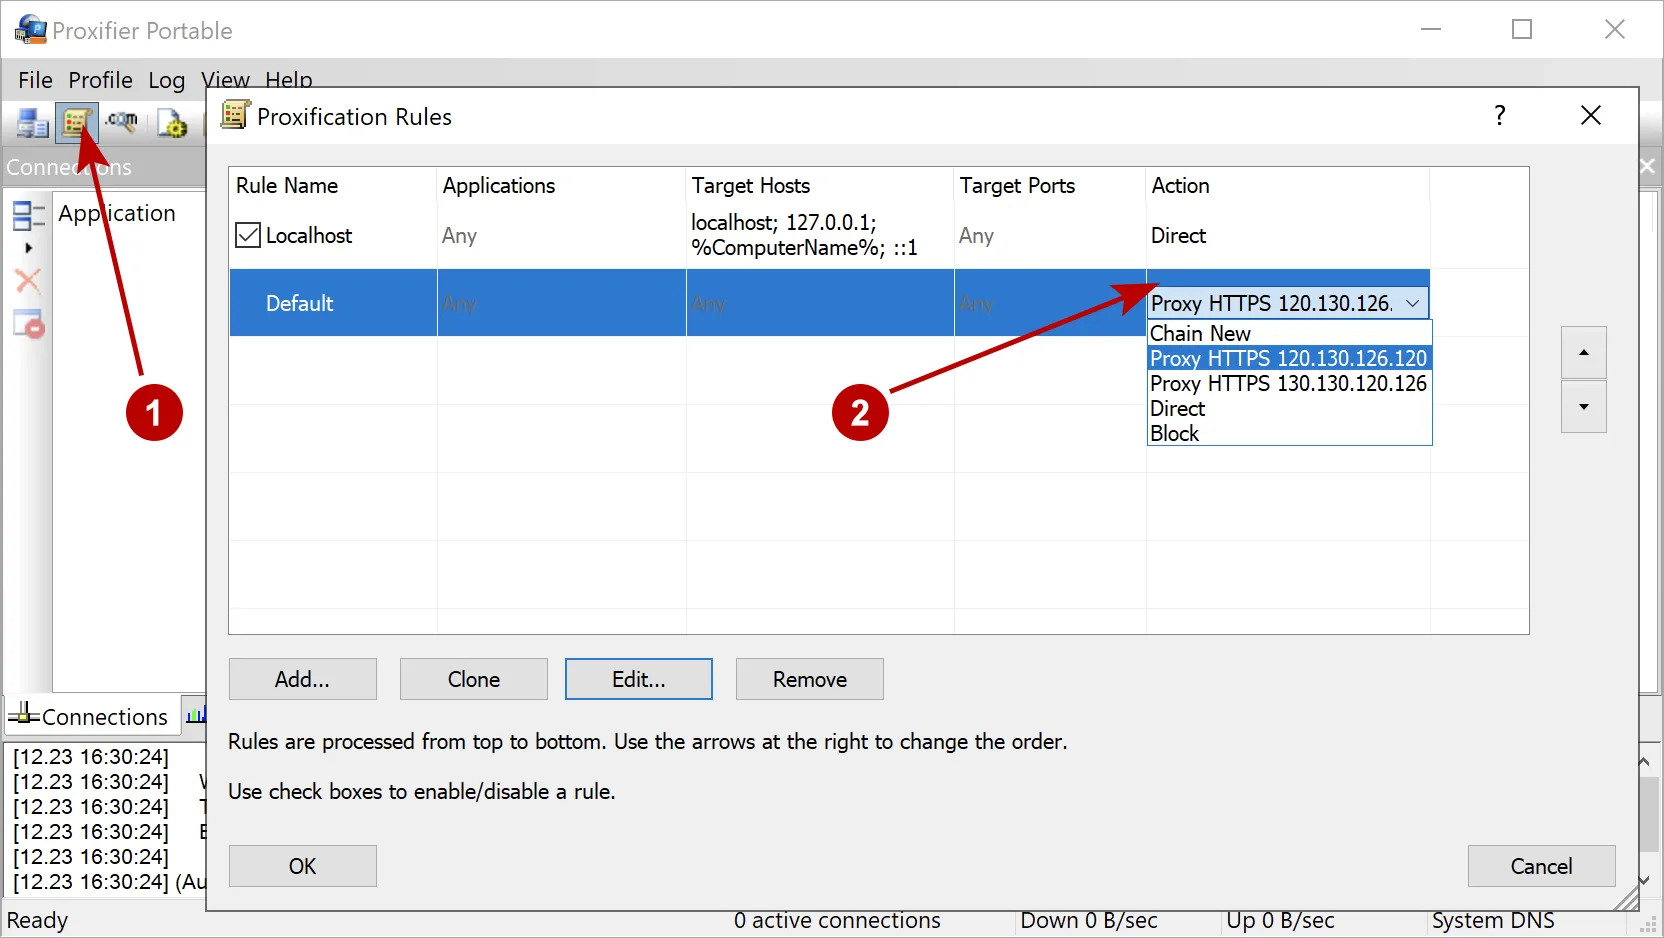
In the "Rules" section, in the "Action" column, select which proxy or chain of proxies to use.