What is a DNS leak and how to fix it
In some operating systems (eg, Windows) DNS queries sometimes pass not through DNS server of VPN connection. In this case, some web sites may detect that your IP address and DNS servers are located in different countries and your anonymity can be compromised.
What is this DNS server
The main purpose of DNS servers is transformation of the domain names to the IP address. In simple words, when you type Google.com in browser, DNS server looks for what IP address assigned to this domain, and the loading of web pages occurs via IP addresses.
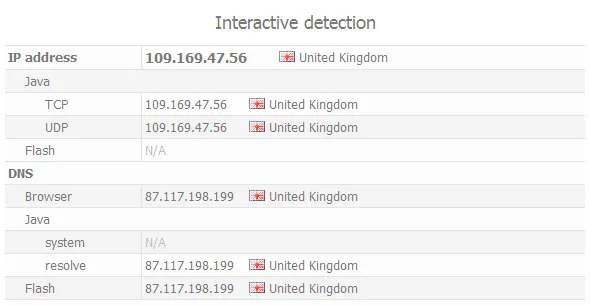
Below you can see a example of DNS server detection on web site Whoer.net.
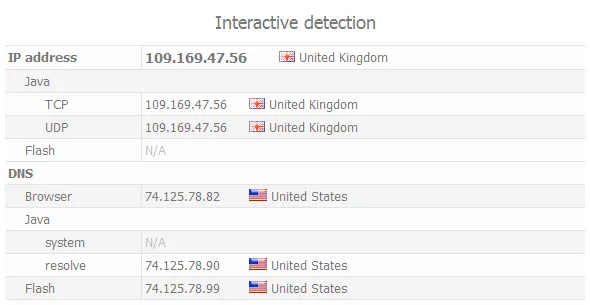
We have connected to VPN and hide own IP (United Kingdom IP) but DNS server shows our real location (USA).
In this case the problem is in principle of the Windows DNS service. When connecting to the VPN, by default, query is sending to the DNS of VPN server. Then the Windows DNS service waits 2 seconds and if the answer did not come, it sends a request to the next DNS server in the list of Windows. It could be your real DNS of ISP.
DNS of VPN server may has no time to respond to the request on time because of geographical remoteness of VPN server from you. DNS server of your ISP is located closer to your computer. Also, on this may affect the quality of the signal from your ISP to VPN server.
Solution: forced using of the required DNS server. In this case, we clearly indicate to the operating system that you want to use only the specified DNS server.
How to hide real DNS in Windows
How to hide real DNS in Mac OS X
How to hide real DNS in Ubuntu (Linux)
How to hide real DNS on server-side Linux
Our VPN client Secure Kit can fix DNS leak automatically. Learn more about Secure Kit.
How to hide own real DNS in Windows
Make the next actions in any version of Windows:

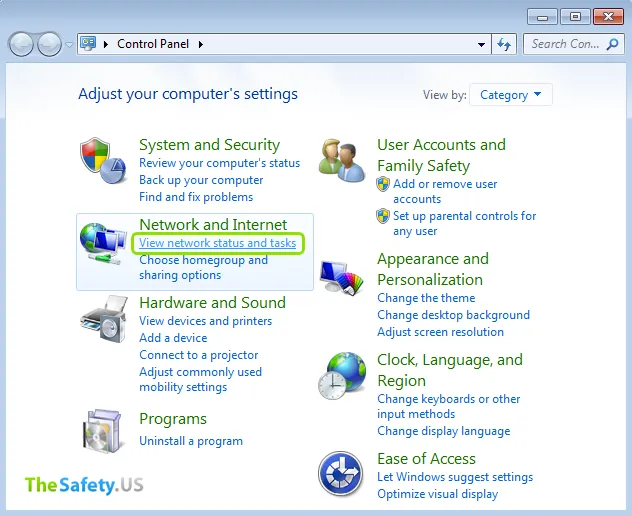
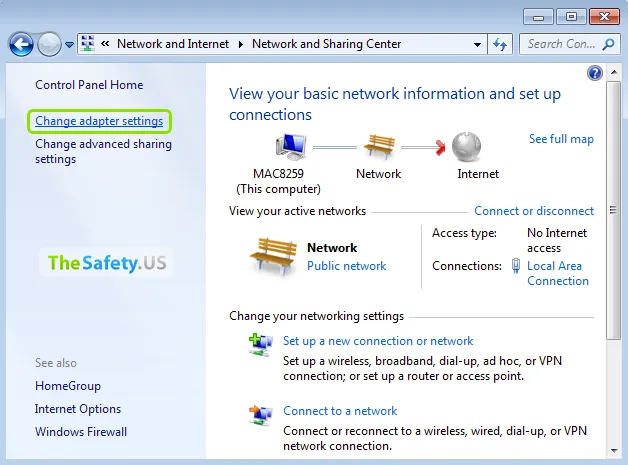
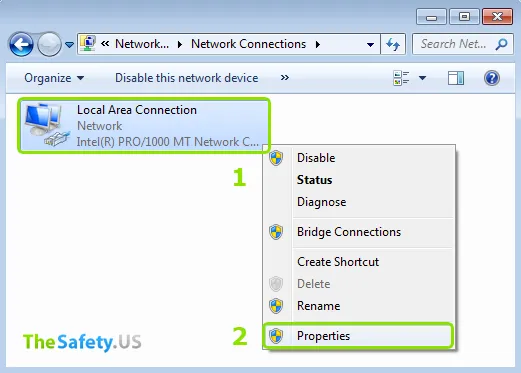
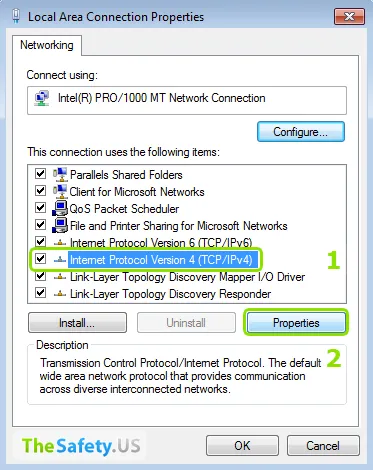
Click right mouse button on network connection of Windows and then choose "Properties".
Type public DNS servers of Google or OpenDNS.
Google DNS:
- 8.8.8.8
- 8.8.4.4
OpenDNS:
- 208.67.222.222
- 208.67.220.220
These DNS servers usually defined as the United States. So will be impossible to detect your real DNS.
For full anonimity we recommend use our DNS servers. In your account on link "Subscriptions" -> tab "DNS" will appear DNS server recommended for using with our VPN servers. For each VPN direction will be indicated own DNS server. And in this case your DNS server will be always match to your IP address (by country).
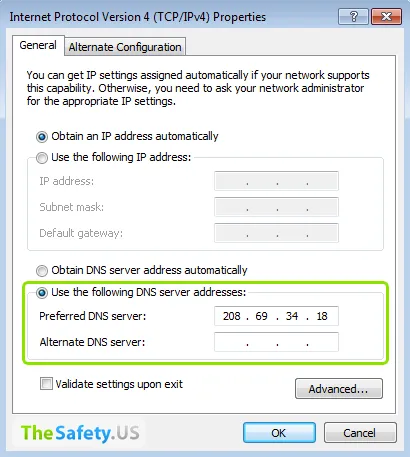
After these actions your real DNS in Windows will be hidden.
How to hide real DNS in Mac OS X
To force the DNS settings on any version of Mac OS X, follow these steps:
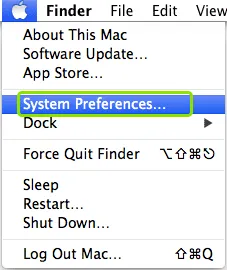

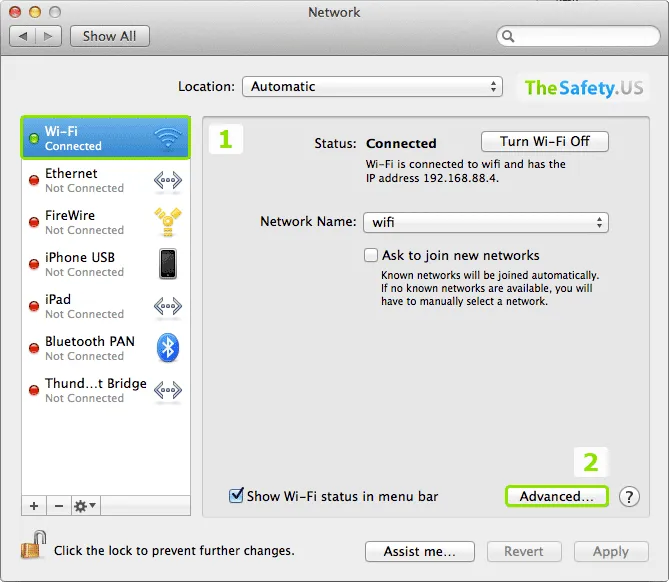
In the next window, click on the icon at the bottom of the lock to allow editing of settings. Need to enter the password on the account Mac OS X.

Select the connection that you use for the Internet. Typically, this is either Wi-Fi connection, or Ethernet. And then click on "Advanced".
Type public DNS servers of Google or OpenDNS.
Google DNS:
- 8.8.8.8
- 8.8.4.4
OpenDNS:
- 208.67.222.222
- 208.67.220.220
These DNS servers usually defined as the United States. So will be impossible to detect your real DNS.
For full anonimity we recommend use our DNS servers. You can find DNS servers recommended for using with our VPN servers in section "My account". For each VPN direction will be indicated own DNS server. And in this case your DNS server will be always match to your IP address (by country).
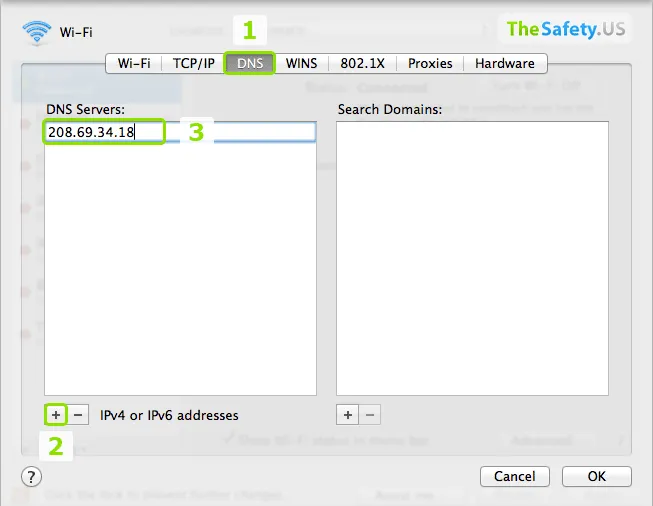
After performing these steps, your real DNS server in Mac OS X will be hidden.

How to hide your real DNS on Ubuntu
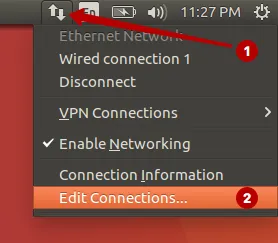
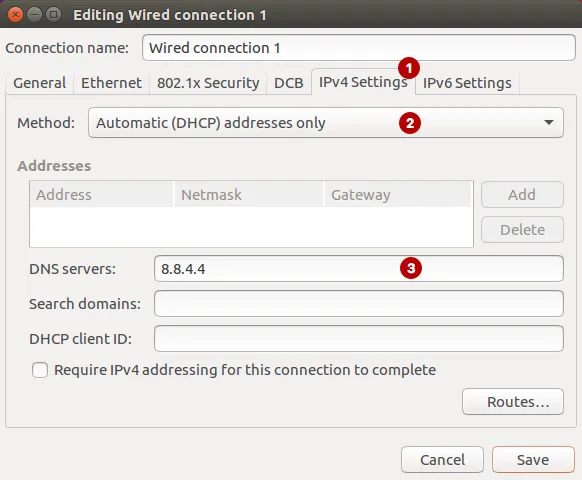
To fix DNS leak in the Linux-based Ubuntu operating system, open the Connections section.
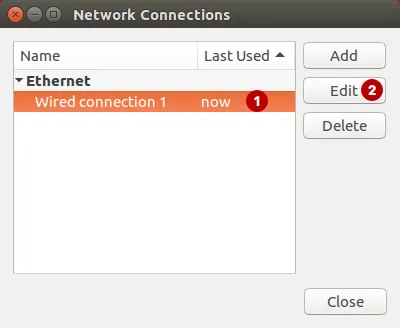
Select your Internet connection and click Edit.
Choose:
- IPv4 Settings tab
- Automatic (DHCP) addresses only
- Specify the DNS server. For example, you can use public DNS servers from Google or OpenDNS
Google DNS:
- 8.8.8.8
- 8.8.4.4
OpenDNS:
- 208.67.222.222
- 208.67.220.220
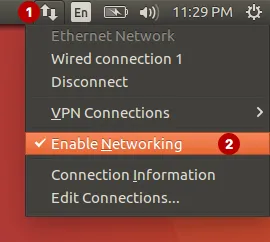
In Linux, you must restart the network settings for the changes to take effect.
Click to Enable Networking.
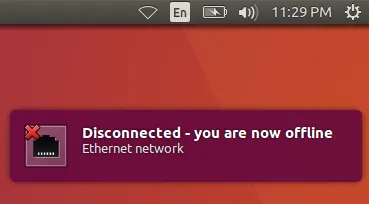
The message Disconnected.
Then click on Enable Networking again to enable the connection.
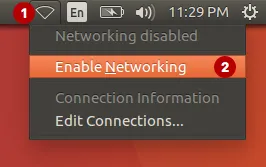
After these actions, your real DNS server will be hidden.

How to hide your real DNS on a server-side Linux
Follow these steps only if you consider yourself to be a Linux expert. We warn that making manual changes is dangerous if you have little knowledge of how to administer Linux. Attention: we disclaim responsibility for the consequences.
Login to the server as root by the user (or under the normal user, but you should have the privileges to execute commands under sudo).
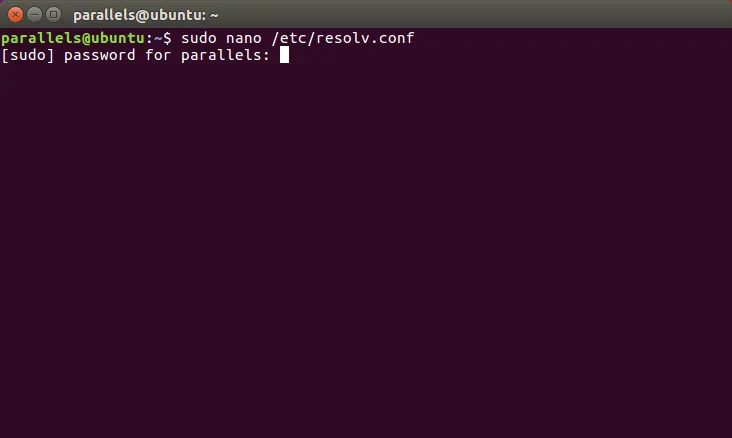
Type the following command. You may need to enter a password from the OS account. For editing, use the text editor nano. If you do not have it installed, make changes with another editor or install nano.
sudo nano /etc/resolv.conf
- If you have a resolvconf installed, this file will display a message that after the OS is rebooted, all changes to this file will be lost and the settings will return by default. Since we change the DNS server temporarily, it suits us.
- Write down the DNS server specified by default in this file. Then change the DNS server. For example, you can take a DNS server from Google or OpenDNS.
Google DNS:
- 8.8.8.8
- 8.8.4.4
OpenDNS:
- 208.67.222.222
- 208.67.220.220
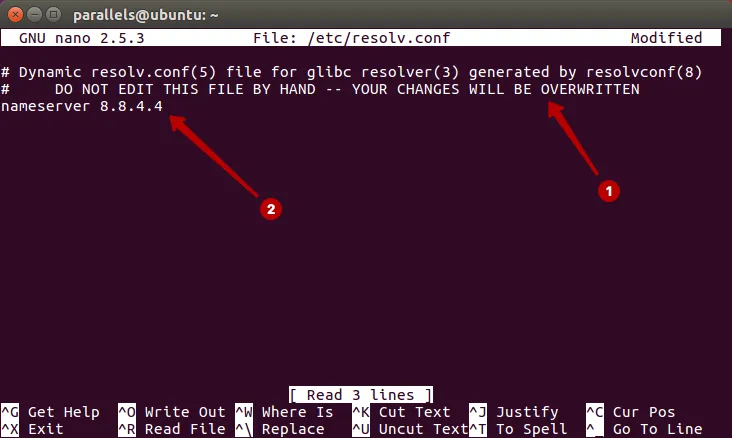
To save file in the nano editor, click:
- Ctrl+X for exit from editor
- button Y to save changes in the file
- button Enter to confirm of saving to the same file
For the changes to take effect, you must restart the network interface.
- for Debian and Ubuntu type command:
sudo /etc/init.d/networking restart
sudo /etc/init.d/network restart
The network interface will reboot and DNS leak will be fixed.
Restart the computer to return the original DNS server.

